Fixing curves, for me, is an every day activity. Sometimes they look oddly pointy, too steep or too wide, guiding my eyes to awkwardness.
And since I’m an optimization freak (as you could tell on my previous article on Bézier curves), I end up using some procedures to tackle problems.
So, today I want to share with you a couple of techniques I use a lot. Here we go!
1. Method 1
If you’ve read my article on Bézier curves (and you should for the sake of understanding this article), you’ve noticed that I stressed on how important point placement is. Here’s a summary of what I recommended:
- Keep nodes at the extrema;
- Keep handles vertical or horizontal (with the obvious exception of corners);
- Use explicit inflection points.
But this doesn’t mean that you should immediately start drawing this way; these are only requirements for you final work.
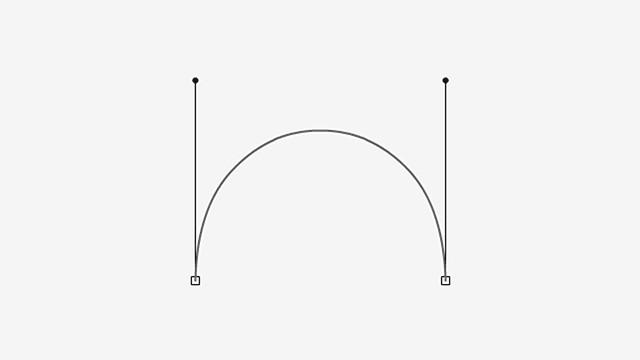
With this said, consider the following lowercase n:
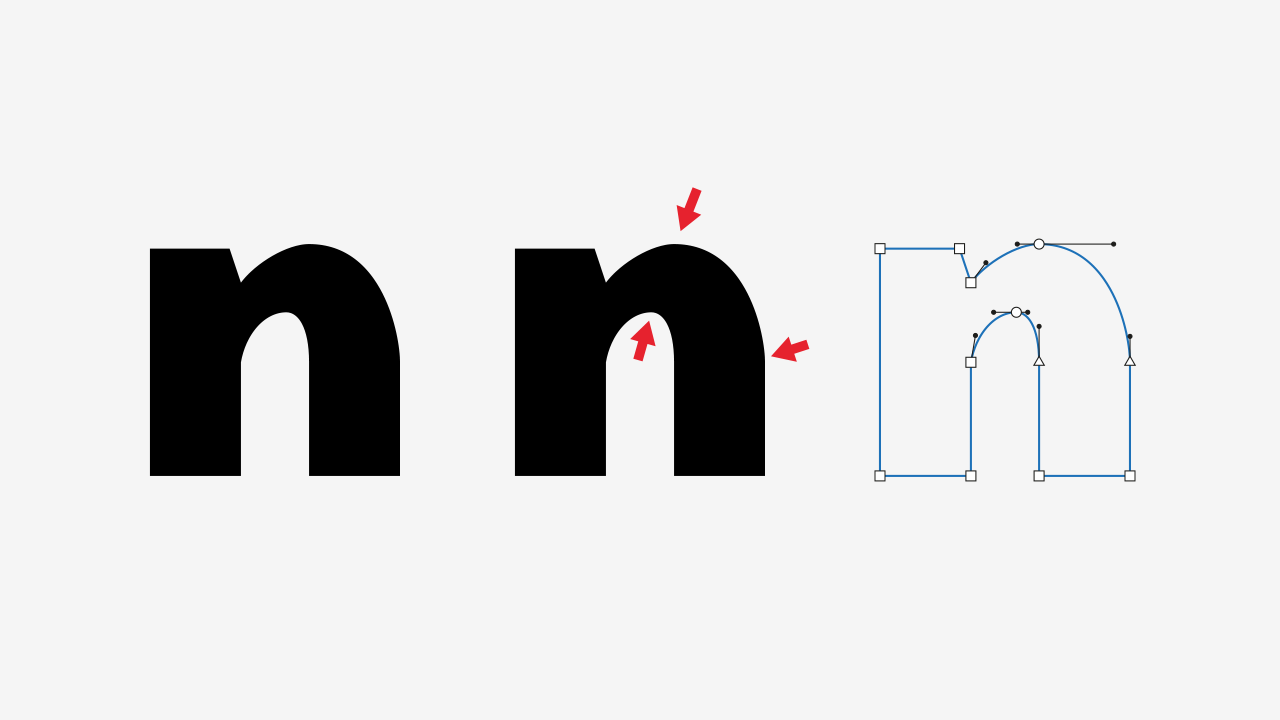
As you can see, those curves are in terrible shape, due to unfortunate point placement, resulting in pointy areas. So, how do we solve this?
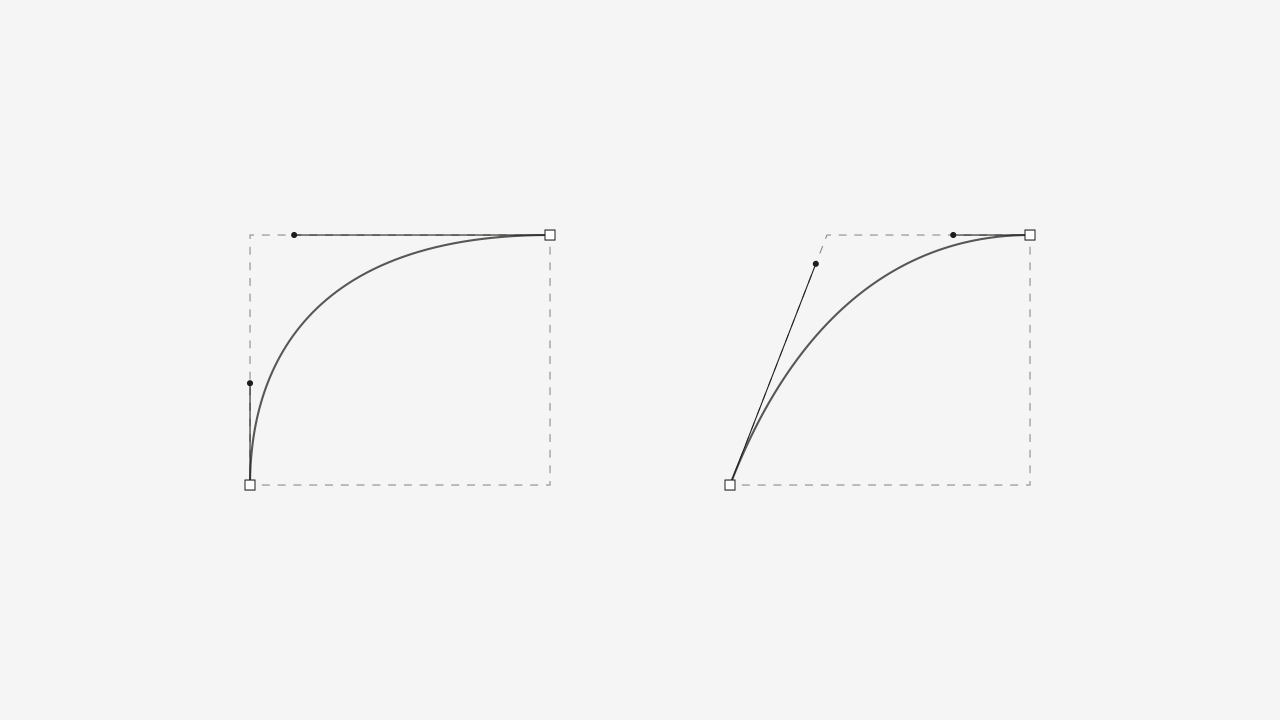
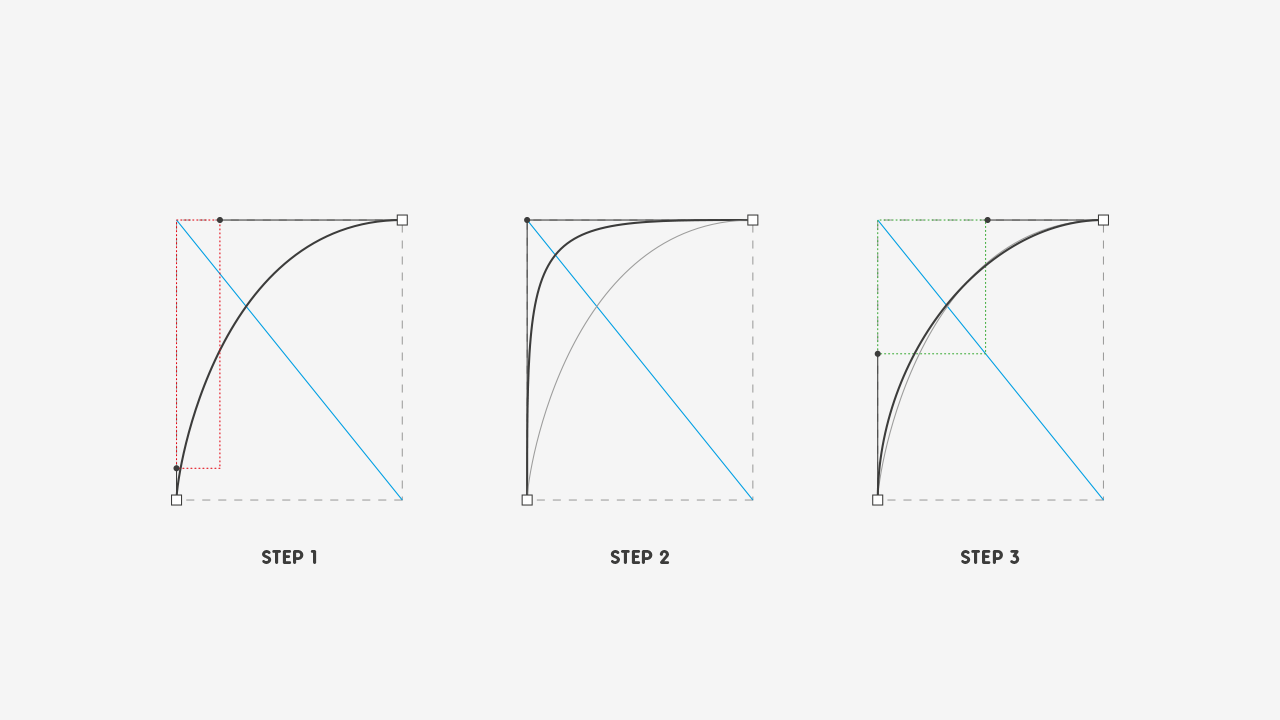
Let’s start by fixing the top curve:
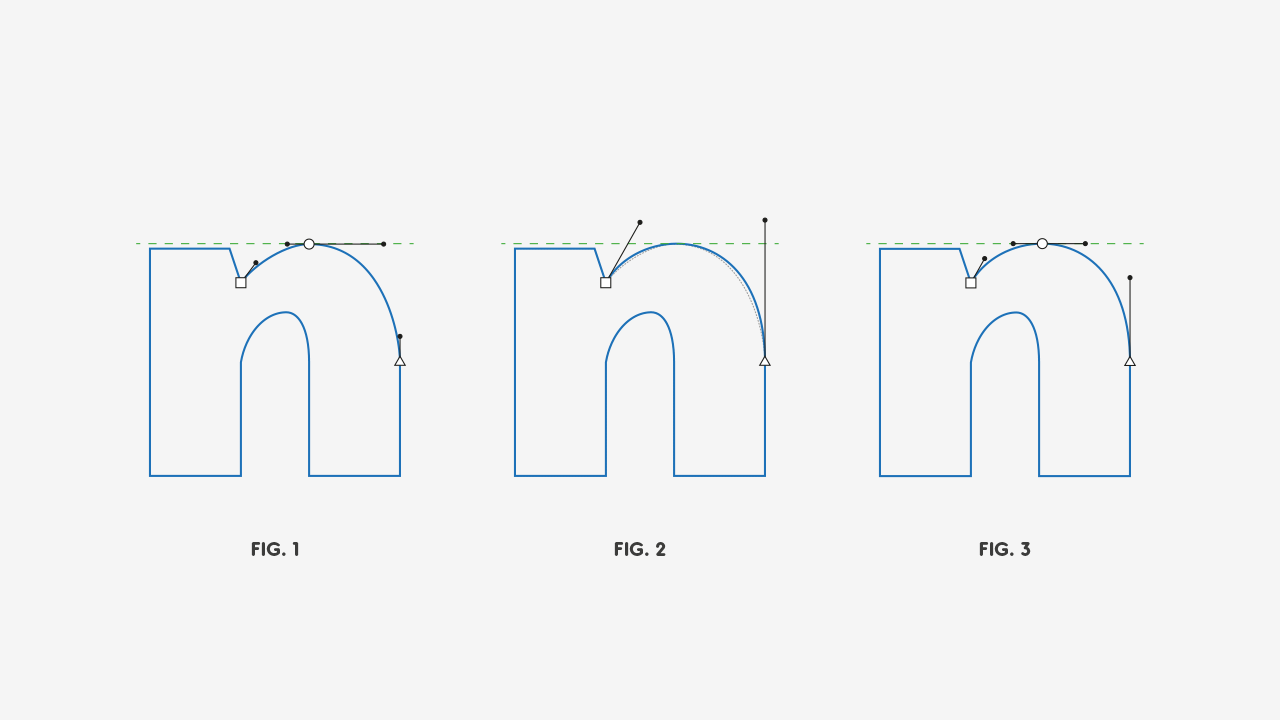
Here’s what happened:
- Figure 1: The first step is to bring a guideline to mark where our extreme-top point is, for overshooting purposes;
- Figure 2: Then we remove the extreme point and adjust the curve to out liking, while using the guideline as a reference for how much up the curve can go. The gray dotted line is just the previous curve;
- Figure 3: And finally, we add the extreme point. You can eyeball this, it’s nothing fancy. The extreme point should just be where the curve touches the guideline.
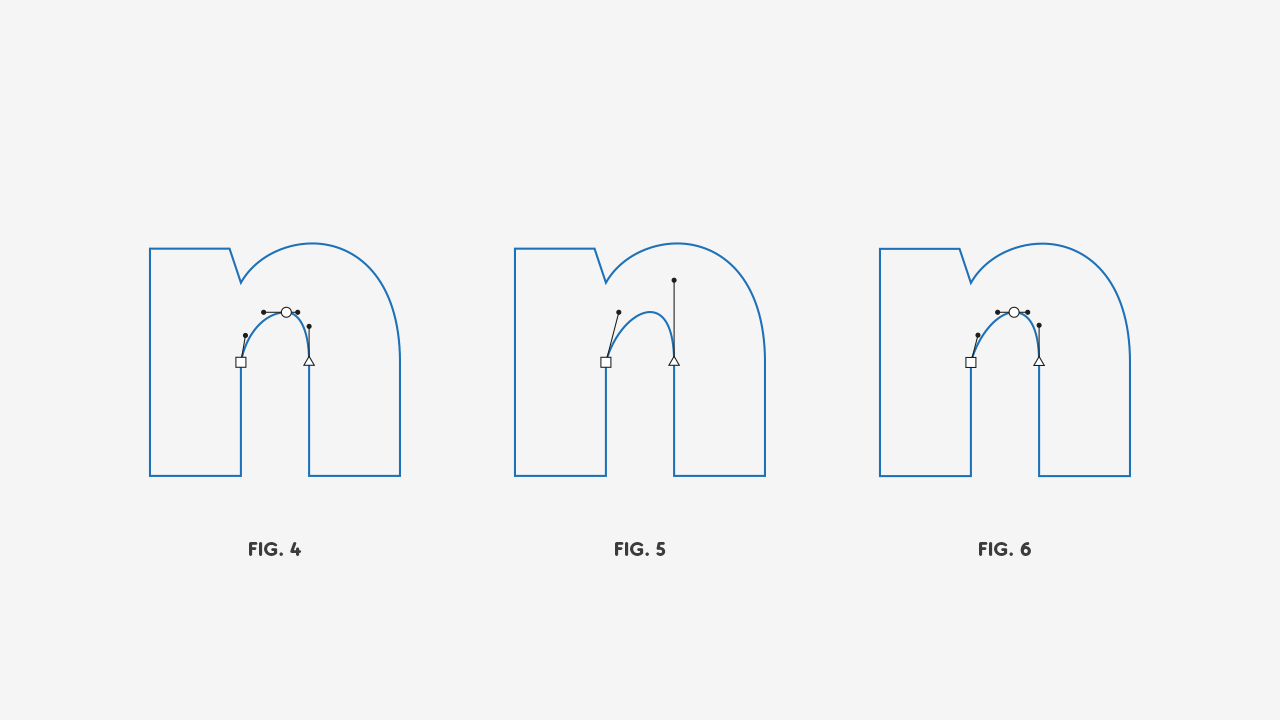
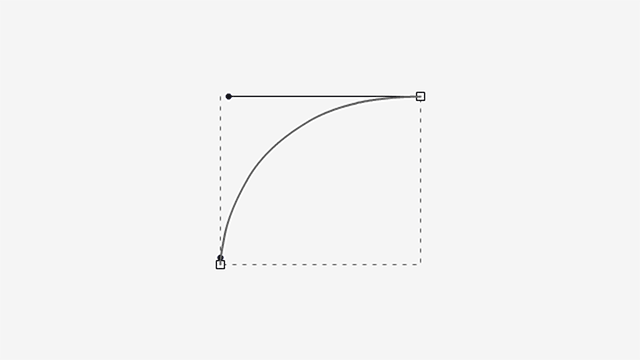
And here’s the same process for the inside curve:
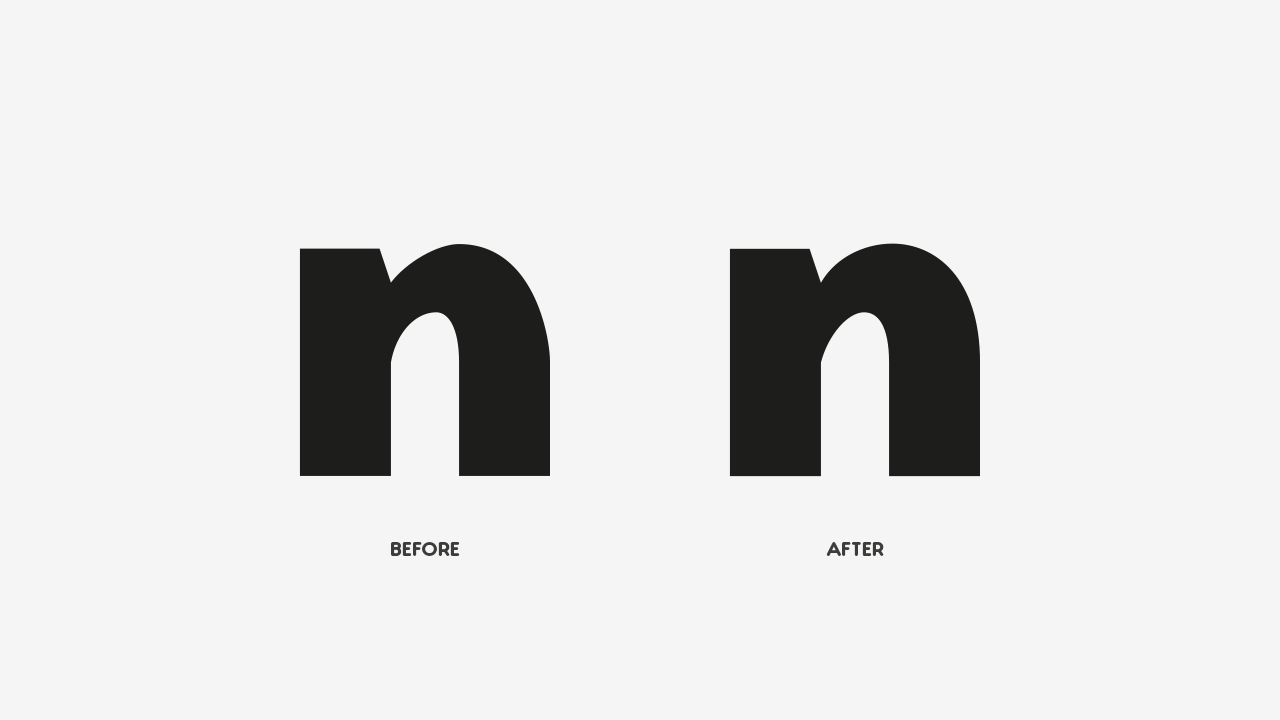
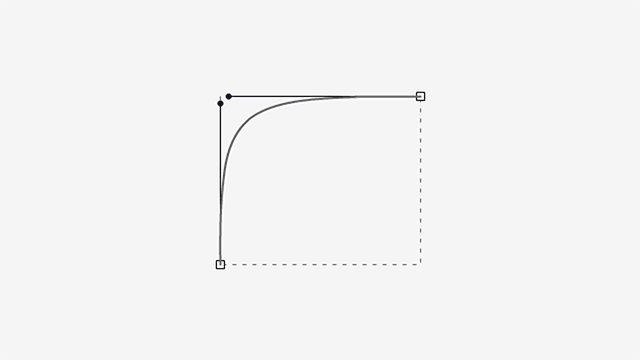
And a comparison between our original n and our corrected one:
So, what happened here? Here’s some observations:
- Manipulating two handles is way easier than four handles and an anchor;
- This method provides us a way to find the optimum position for where the extreme anchor should go;
- We let the point addition algorithm find out the best handle position for us;
- Even if we need to do some minor adjustments, it’s easier and safer to adjust a respectable curve than a clumsy one (I know I’m personalizing the curves, I know).
1.1 Problems With This Method
This has some limitations, of course:
- It’s not adjustment proof: You might still need to do adjustments to the curve. But hey, you’re closer than you were! And prepare yourself for §2, it might come in handy;
- It doesn’t work very well with angles above 180º: For the same reason that we can’t use this method with quadratic Bézier curves, we would need 4th or higher-order Bézier curves to use this method with a fair degree of control. And in plain English: this works with parallel handles or with a smaller angle, because otherwise, you’re no able to control the curve’s extension and steepness. And here’s an animated GIF, because you guys love these things:
2. Method 2
And here we are. *awkard stare*
So, back to business: how do the point-addition algorithms distribute the handle length? Well, they keep the handle length proportionally equal, to keep the curve as smooth as possible.
With this in mind, when we have our handles in a 90º angle, we can fit our 4 points in a square. And with less than 90º, a trapezoid:
Let’s stick with the rectangle, for simplicity’s sake.
By now, your inquisitive mind might be asking:
What happens to the curve if one handle grows from the minimum to the maximum length, inscribed in the rectangle, while the other does the opposite?
And now you must be thinking how did I read your thoughts, right? Right.
But let’s not deviated from the subject; here’s what happens:
As you can see, the curve bulges slightly in the extended handle’s side and gets steeper in the retracted one.
Now, what happens if both handles go from minimum to maximum length?
You probably saw this coming.
Well, first of all, I apologize for the slow build up, but I wanted you to be aware of the two factors, because you’ll be dealing with them with this method.
By the way, I don’t know if you keep the habit of click-and-dragging curves, but if you don’t, start doing it. And in most drawing applications, holding the Shift key down keeps the handles in the same vector.
If we want to keep the handles’ lengths proportionally equal, the rectangle from their maximum length point to their actual position has to be proportional to the anchor’s rectangle. Here’s an image to clear this out:
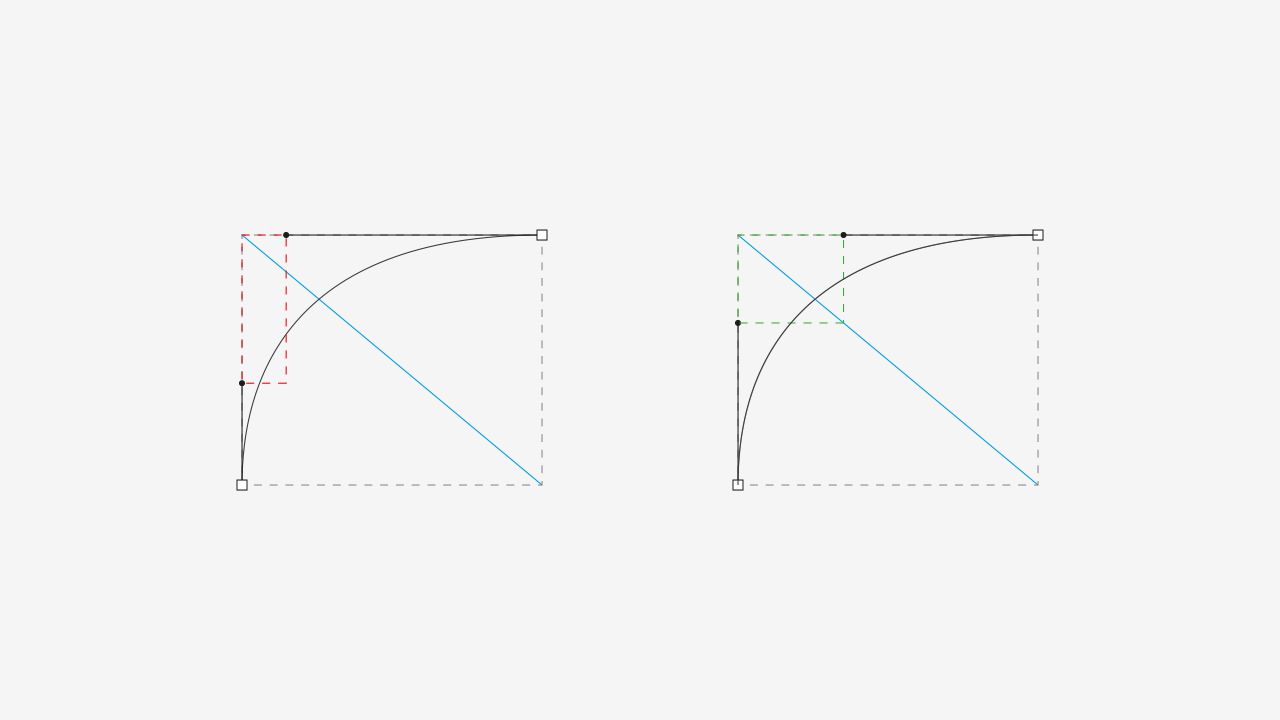
The effect that this has on this curve is minimum, but it distributes the curvature evenly.
So, here are the steps to do this:
- Get an unevenly distributed curve;
- Extend the handles to their intersection point;
- Press the Shift key (to keep handles straight), click on top of the curve and drag it back. Gently tilt to the sides, trying to get both handles proportionally equal until you get the curvature you desire.
With practice, you’ll be able to eyeball the entire process and still get some sweet and smooth curves.
3. Final Thoughts
I hope you’ve found this article helpful, since I find these make me work faster (I struggle less to achieve satisfactory results), while it keeps the overall look of my work consistent.
Thanks for reading this and if you like it, share the knowledge! Cheers!